Tuesday, October 27, 2020

That's a Pretty Good-Looking Boat


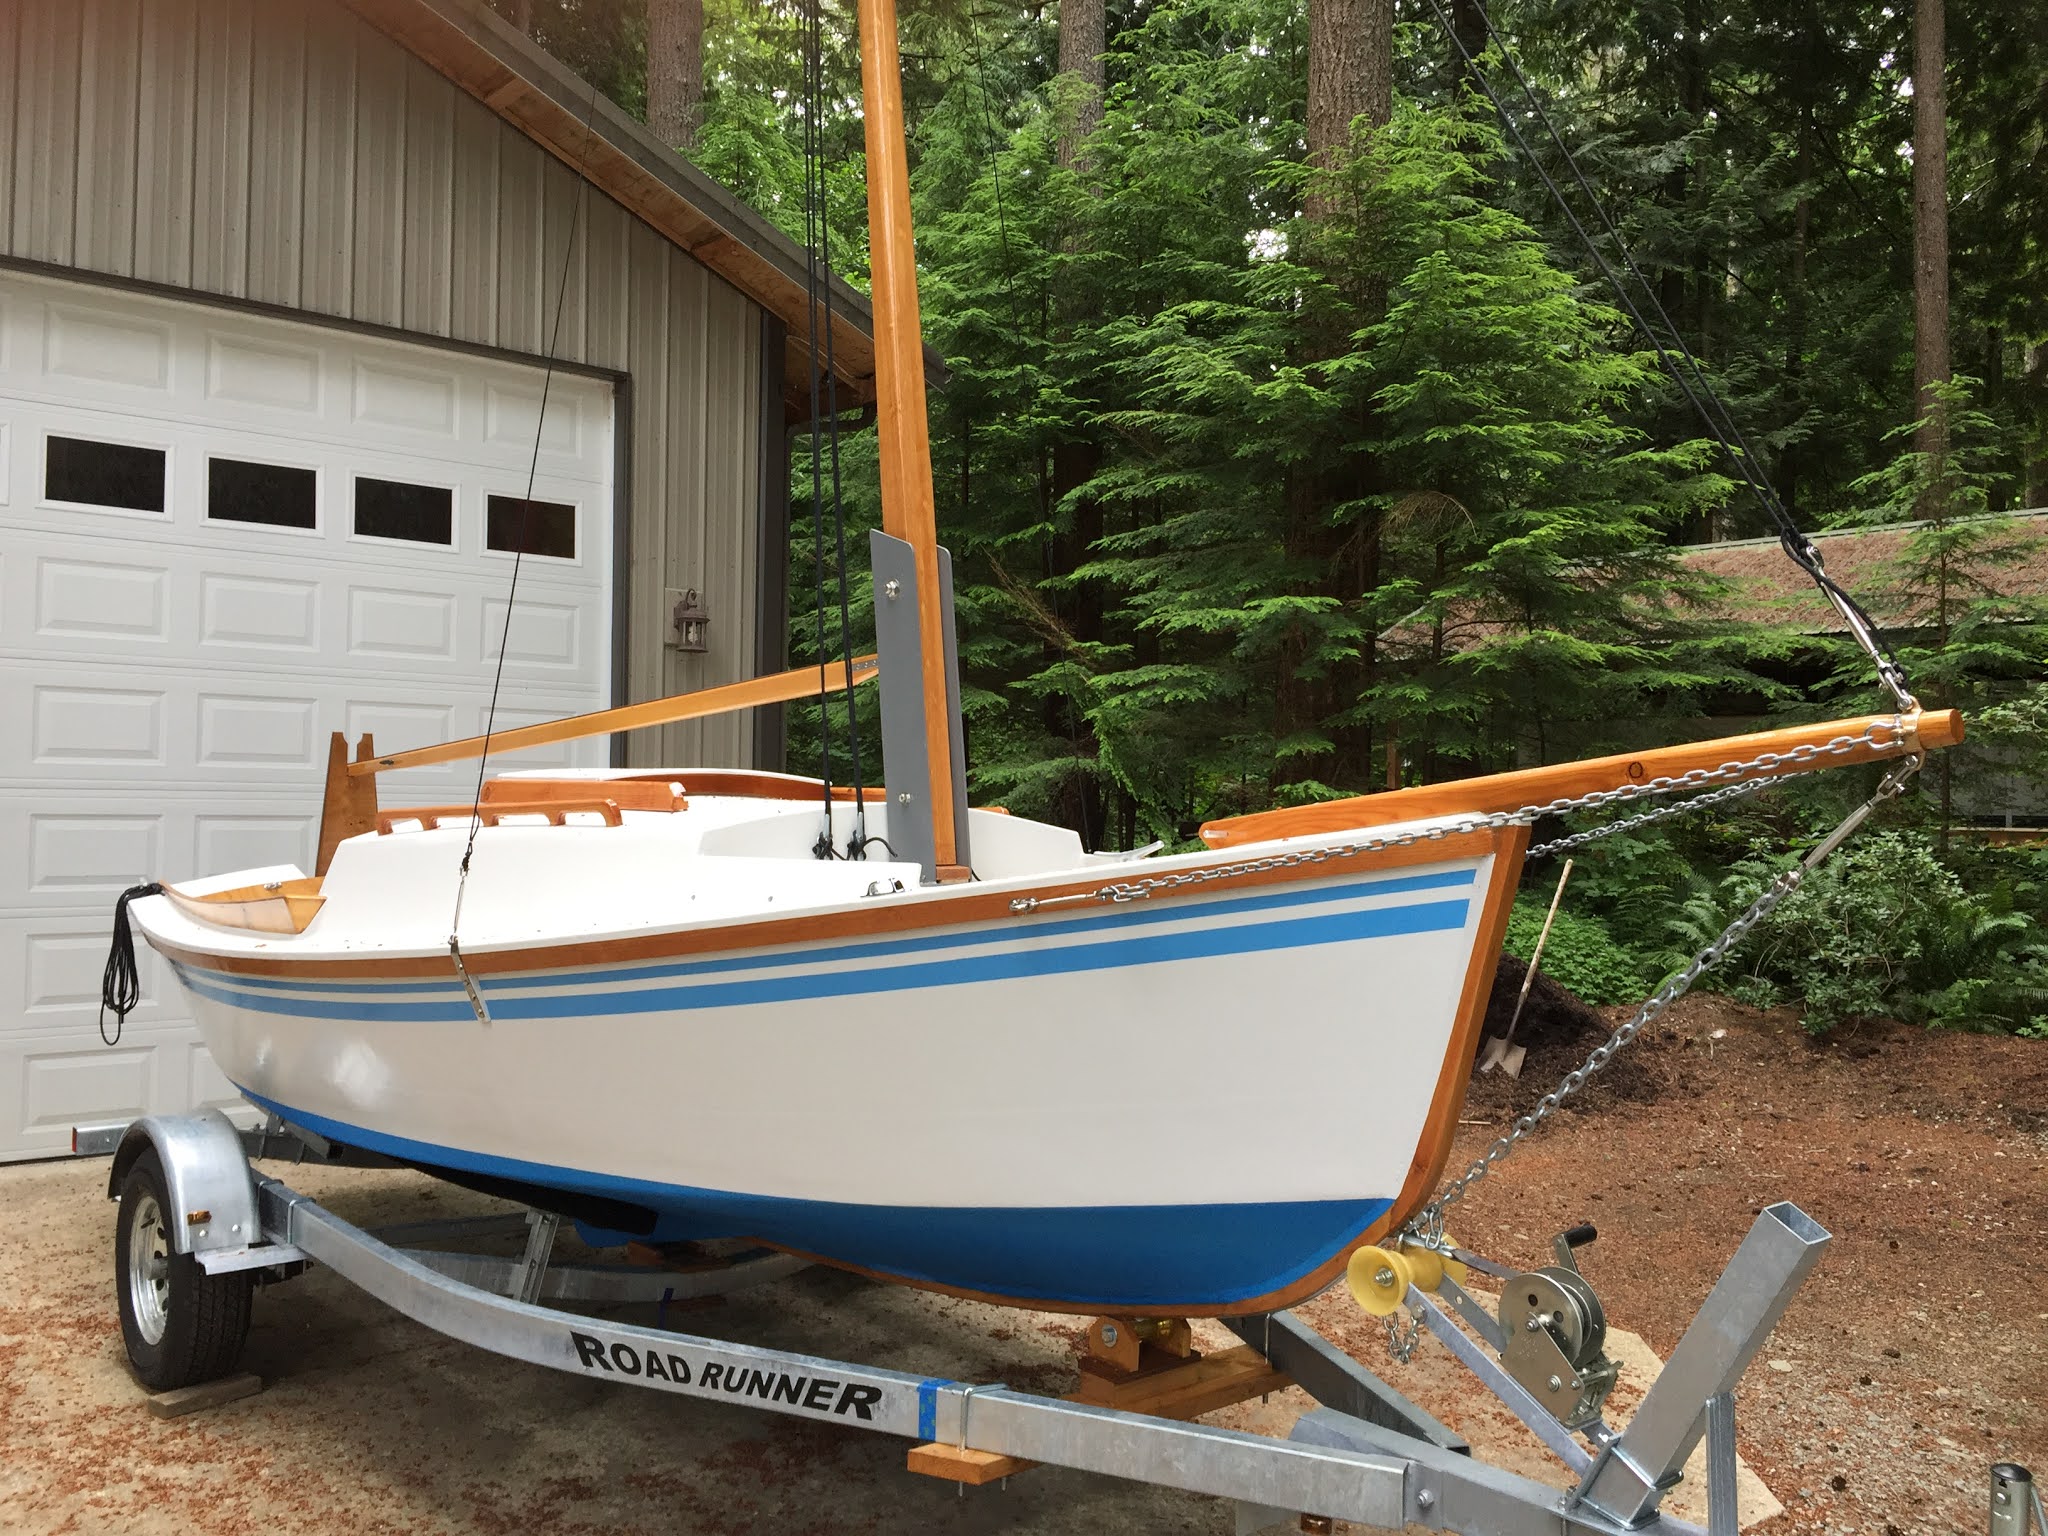
After starts and stops, fixes and re-fixes, and the slow process of learning to sail this boat that we built, I can finally say that we have arrived.  The building of our boat is complete, if any boat is ever truly complete.

All that's left now are the sailing adventures.

Tuesday, July 17, 2018

First Sail. At long last!

The floating party was amazing, and fun, and a satisfying climax to this project, but it wasn't quite the end.  We had to actually sail it.

After a day and a morning of preparations, such as cleaning, checking and rechecking the rigging.  Getting better at raising and lowering the mast, we set off on a beautiful, sunny, July day for the boat launch.  And on the water -- it works!  It actually works.  Like a real sailboat!


So how was the first sail?  Well, she's not a racer, but she's solid and steady, and she cuts a beautiful line on the water.  Of course, there were some creaks that made us scratch our heads.  And the gaffe jaws continually tried to ruin our lovely mast, and partly succeeded.  And she didn't really want to stop sailing; that is, when we tried to take the mainsail down, we had to get a little rough.  So there may be things to adjust and re-work.  

Did I say that the first sail would be the end?  More like the beginning, but a beginning with plenty of promise.


Sunday, July 15, 2018

Rigging - Sails Up!

Time for this sailboat to have sails!  Thanks to Chuck Domby, who gave us an beautiful old triangular sail he had, and we measured it out to have it cut for our gaffe-rigged boat. 


Sunday, July 1, 2018

Rigging - Part I

It turns out that when you think you're almost done building a sailboat, that you have to do all the things that actually make it a sailboat -- aka "rigging".

First were the stays -- those are the ropes (later, cables) that keep the mast upright.  Tricky to get the lengths right.

Then came the extra hardware to keep all the ropes (oh, those are coming!) in line.  The pulleys that will handle the main sheet, mounted on the boom, and a nifty mast/boom holder for when the boat is in transit or trailered.


Friday, June 15, 2018

The Great Sliding Hatch Cover

The Engineer (Jay) came up with a beautiful sliding hatch cover.  It's easy enough to move, and heavy-duty enough that it won't get off track, and would probably even survive one of us standing on it!


He also added a slick handrail next to it!


I love all the brightwork that just leads the eye right up to the bowsprit.

Friday, September 1, 2017

Wait... Where'd We Put the Mast?

After leaving her in the water a few days to make sure she didn't sink, it was time to affix our spruce masterpiece of a mast and frame the hatch cover.


Monday, August 14, 2017

Launching, err, 'Floating' Party!

We've been working all summer in preparation to launch the boat, and really, for the past 6 years, we've been preparing to put the boat in the water.  That finally happened last Saturday, August 12th.  While somewhat far from being complete, the boat was painted and plugged and, well, seaworthy.

In the morning, my Dad drove the trailer down to the far end of the lake, where the boat launch is.  I drove the powerboat over.  Once we had the boat in the water and hooked up, we switched and Dad drove the powerboat, towing the sailboat with me in it.  Yes, I got the first ride! :)  Later in the day we had some neighbors and friends over to see the launch, and I ad-libbed a christening 'ceremony.'  It was great fun, and so awesome to see the boat finally in the water!  She's sleek and ... hydrodynamic.  It's a nice, low-slung, look in the water, that is somehow reminiscent of a duck (the plans call her the "Eider" but we decided on the name "Wind Runner."
Here are some photos from the day and a video of the christening if I can upload the whole thing... (I'll try to do this for later...)


But really, you've got to watch the video of the christening!


Sunday, August 6, 2017

Trailering

This was something of an adventure.  We didn't know ahead of time if the trailer would fit.  We thought it would, because we'd made measurements, but there's a lot that goes into it, and in the end, it proved difficult to know whether something unexpected would foil our attempt.

Initially, the boat was on four stands, on which it has stood, more or less, for the past five years.  Trailering entailed removing one stand and replacing it with a car jack, backing the trailer up as far as we could... then moving that jack, removing a second stand, adjusting the rear stands, replacing the car jack in a different location ... you get the picture.  Trying to keep the keel from scraping against the steel cross-pieces of the boat trailer was the hardest part, but it escaped with only a couple of little crunches.  It was a tough process, and a tiring one, both emotionally and physically, but I have to hand it to my Dad -- he really thought through the process, and in the end, it worked out well.
It was amazing to see the boat on a trailer and outside of the garage for the first time!  It looked smaller (being down lower), but it was also awesome to just sit back and her smooth lines... and then it was on to working that accent stripe on the side... (yup, more taping...)

Tuesday, August 1, 2017

Exciting Day... Brightwork Revealed!

Today we took an easy day, due to doctors appointments and such.  Since we just put the final (ahem, is it ever the 'final' ?) coat of topside paint on, we decided we could finally remove all the masking tape that had been protecting and hiding the woodwork on the boat.  Most of the woodwork (brightwork) is already varnished, but not quite all of it.  Here are some photos!

We also installed the centerboard in its box (from the bottom up), and then it was time to pull off the tape!  You also get a nice view of the cockpit.  The side pieces are cedar from the property and are called the 'coaming pieces'.  Finally, we installed some hardware; cleats and the bowsprit chains.


Topside Painted!

After days upon days of painting, sanding, re-painting, re-sanding, mixing paint with flattening agent for portions of the boat (to reduce gloss), re-painting, mixing paint with no-skid additive for stepping surfaces... it is finally painted!  In the end, we went with Matterhorn White, which has a bit of gray in it.
It looks sharp with the wood, and with a flattening agent added on the topsides, it's less glossy.  I like it.

Here are some photos from the process.  It's amazing how boat paint is not at all designed to hide defects; it brings them out!  So we sand.  And sand.  We added some no-skid to the flat surfaces to help prevent slipping.  Then it was time for her racing stripe.  It's also amazing how frustratingly good the human eye is at noticing tiny imperfections in the curve of a line.


Monday, July 24, 2017

Topside Paint II: "Off-White"

We managed to find a quart of Interlux's "Off White" from West Marine in Anacortes, where we went yesterday to pick up the paint and stroll among the boats moored there.  We were looking a different paint schemes, as well as some of the rigging equipment on the various boats, to get ideas and confirmation of our (Dad's) ideas.

Today involved putting a coat of the off-white on about half the boat, painting the upper hull, and doing some odds and ends (such as epoxy sealing portions of the hatch covers that we'd routed off, cutting the mast to length and drilling a hole (and then sealing it) in the upper mast for the gaffe rope.  Now we have something of a two-faced boat, with about half done in off-white (starboard) and half done in matterhorn white (port).  Now to pick...
I think this last one (of the cockpit) reminds me a little bit of the Space Shuttle Cargo Bay... you know, at 1/20 the scale...