There comes a time in the life of every boat to be ... when it ought to be right-side up. And that time was today. There are many complicated schemes for rolling boats. There are winches and cranes; there are round rolling frames built latitudinally around the bulkheads; there are hoists and ropes and cradles; and there is plain old manpower.
As my father's comrades in the Lake Cavanaugh Volunteer Fire Department started to show up this morning, each arriving by boat or by truck, hopping out with spryness and grim determination, I couldn't help but recall the fortification of Minas Tirith before the armies of Mordor. As I read of soldiers arriving from the outer parts of Gondor, and the hosts of the prince of Dol Amroth, I feel excitement building a growing confidence -- how could we not fail to withstand the hosts of Mordor?
But unlike the vast armies of Sauron, the boat flipping turned out to be much easier than anticipated. Plans and strategies were conceived, eventualities analyzed, emergency materials for blocking the boat upright were on hand - but in the end, all it took was a bunch of strong guys and good directing.
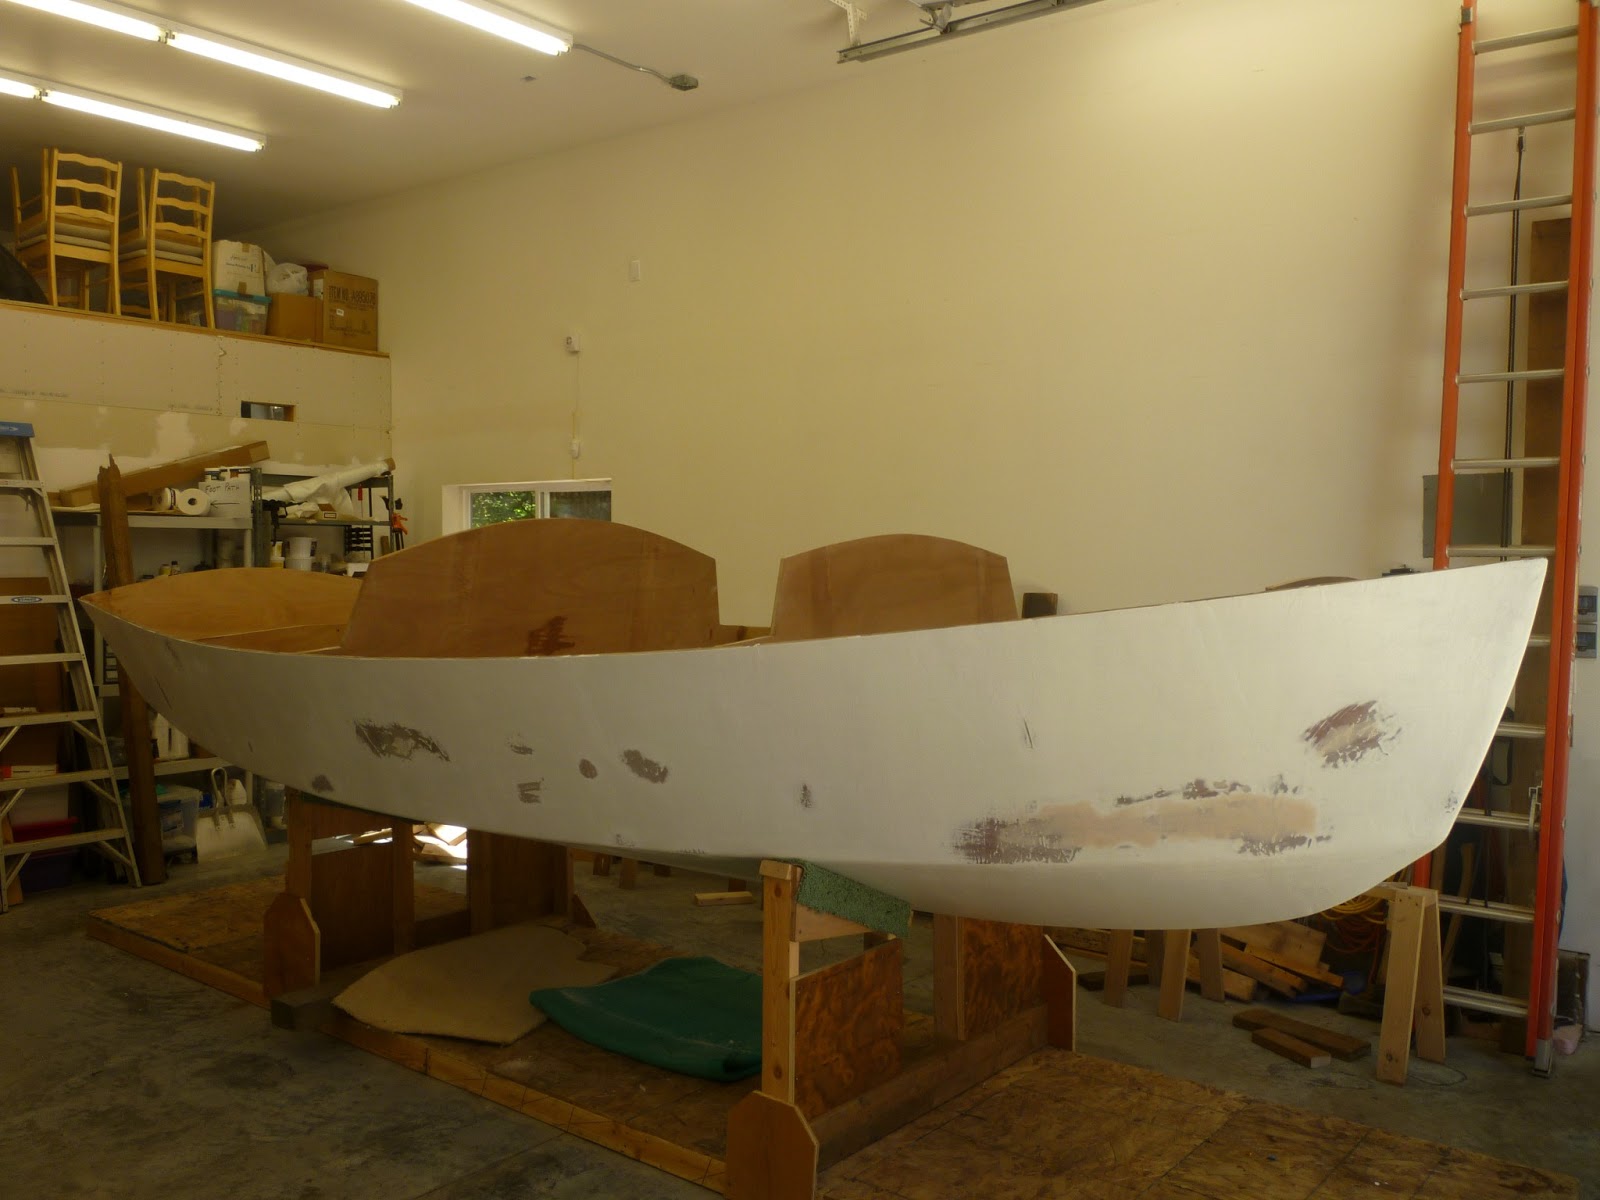
And NOW, says my Dad, it's starting to look like a boat. Many thanks go to the members of the LC Fire Department!
Saturday, July 13, 2013
Tuesday, July 9, 2013
Debeautification
Another thing I've learned about building a boat is that things tend to get less pretty -- not more -- as time goes by. Let me give you some examples:
1) You gaze admiringly over 4x8 sheets of sleek, marine-grade mahogany plywood, then proceed to cut, scarf, epoxy and sand it into submission.
2) You cut out the pieces, fit them on the frame, and proceed to glue them together using enormous, unsightly lumps of a peanut-butter-like thickened epoxy.
3) You sand the hull until smooth and beautiful, layer on neat epoxy until the surface shines, then you sand the holy hell out of it. And adding insult to injury, you then add dark brown-colored thickened epoxy in some places to smooth things out.
4) Finally, the whole thing is sanded. Epoxied. Sanded. Epoxied. Sanded. Faired. Sanded. Sheathed with fiberglass. Epoxied. Sanded. Epoxied. Faired. Sanded. Then you add the primer until the whole thing is a very respectable-looking white.
Can you guess what happens next?
The damn thing isn't smooth enough in some places, so you sand it some more until it looks like ...
And that's what I call debeautification.
Tuesday, July 2, 2013
Primed and Pretty
When you think about the hours required to build a boat, it's hard to realize how far between those hours can become. Here are some example reasons why you aren't going to get as much done as you think you're going to get done on a given day.
1. It has to dry. You have to wait for the epoxy or primer to dry. With epoxy this can be several days in the PNW. And when you discover you missed a spot and have to re-epoxy it? Yup. Another couple days. :)
2. You have to read the book. Wait - what were we supposed to do after this? Oh, it wasn't in the book. No, it was in the little, disorganized, online addendum... better spend some time reviewing!
3. You didn't order enough primer. That takes 3 days to arrive. Hope two coats is enough.
4. You have to sand the epoxy before you can put another coat on (so it adheres). But the sander broke. Or... you used the last of the (correct) sandpaper. Or...
5. You have an inkling you read somewhere, at some point, that the boat needed a keel... when was that supposed to happen? It wasn't in the book. Hmm. Maybe now would be a good time... :)
BUT, delays being as they are, the hull is now primed and ready for paint. Yay! But first, we're going to flip it over. Just us a a few more burly firemen to help (my Dad is a volunteer firefighter). Then starts the interior work!
Saturday, June 22, 2013
Sheathing the Hull
You thought we forgot about the boat, didn't you? But, after long (apparent) hiatus, progress is once again being made, in the form of sheathing the hull in fiberglass cloth. Sometimes it seems like this is less a wooden boat and more an epoxy boat with some wood to hold the epoxy in place.
Some weekends over the past months were spent sanding, building and then installing a box for the centerboard (like a giant hole in the hull... I know), then epoxying the entire surface...
And here's how the sheathing works: we cut pieces of thin, deceptively strong cloth (known as "Dynel") and arranged them over the hull, then proceeded to drench them in epoxy and spend the next hour trying to smooth out all the wrinkles and get out all the air bubbles. It can be tough, as the cloth doesn't follow the boat's curves without naturally folding and forming air bubbles.
Some weekends over the past months were spent sanding, building and then installing a box for the centerboard (like a giant hole in the hull... I know), then epoxying the entire surface...
Above is the view from "down under" the centerboard box installed - where the centerboard can come up into the boat.
Of course, then you look at the outside of the boat and it just looks like a big hole in the hull. Dad suggests that this "putting holes in our beautiful boat" might be a theme.
And here's how the sheathing works: we cut pieces of thin, deceptively strong cloth (known as "Dynel") and arranged them over the hull, then proceeded to drench them in epoxy and spend the next hour trying to smooth out all the wrinkles and get out all the air bubbles. It can be tough, as the cloth doesn't follow the boat's curves without naturally folding and forming air bubbles.
It looks nicer in the end, doesn't it? All shiny and smooth!
Tuesday, August 28, 2012
Seams like Taping. With Fiberglass.
It's a beautiful hull. Once we finished the tabbing, we were able to remove the stitches (that was the painful part, by the way), and fill in the gaps with epoxy. After that it was a sanding game - the word for this is "fairing the hull." Making it beautiful. Making the lines 'fair' so that the boat will move easily through the water.
You can see a photo of the transom, all taped up, and Jay (that's my Dad) finishing up the taping of the starboard joint.
Where to next? We have to apply more peanut butter (less thick, more Jif and less Adams) to smooth out the junction between the fiberglass tape and the rest of the hull. Then we can sheathe the hull completely in fiberglass.
The seam taping involves some 4-in strips of fiberglass tape. To tape the seam, you first need to round it (sanding) and smooth it, then lay the tape carefully and soak it with epoxy to cement it to the wood.
Where to next? We have to apply more peanut butter (less thick, more Jif and less Adams) to smooth out the junction between the fiberglass tape and the rest of the hull. Then we can sheathe the hull completely in fiberglass.
Tabbing the hull
This might hurt a bit -- if you're a boat. At least, I think it would hurt. :)
We start with Frankenboat...
Then we mix up some delicious peanut butter... that's thickened epoxy.
Then you duck underneath the hull and paint epoxy into the seams between the stitches. You have to make it thick or it drips down once you paint it in there. And sometimes it still drips.
We start with Frankenboat...
Then we mix up some delicious peanut butter... that's thickened epoxy.
Then you duck underneath the hull and paint epoxy into the seams between the stitches. You have to make it thick or it drips down once you paint it in there. And sometimes it still drips.
Saturday, June 23, 2012
Frankenboat
It's been a while since we had time to look at the boat, although we did occasionally go out to re-measure, scratch our heads and mutter about whether our little mess-ups were going to be molehills or mountains. But, today we got some real work done and have new pictures to show for it!

This shows the stitching process. Basically, short pieces of baling wire are stuck through pre-drilled holes, and are twisted around from the outside. With enough ties, it holds the panels together well - at least until you start the epoxy/fiberglass process.

See how pleased I look? Notice that I took the pictures at the END of the process. :)

You can see Dad (foreground) and friend Chuck finishing off the stitches on the port side. Big thanks to Chuck for coming to help hold the panels in place while we stitched.

This last photo is the one I think deserves the name "Frankenboat" and no, that will not be the name of our boat! The stitches come out. Next task? Figure out how the heck to pull those panels together to stitch them at the bow! Turns out that 1/2-inch marine plywood doesn't really like to bend. :)
Subscribe to:
Posts (Atom)